
Home > Products > TMPGEnc Authoring Works 4 > Tutorials > Menu Creation: Menu Item Editor - Effects
Tutorials
Tutorials
DVD Creation
Adding Subtitles
Transition Effects
Menu Creation
Title Sequences
Menu Creation

Menu Item Editor: Effects
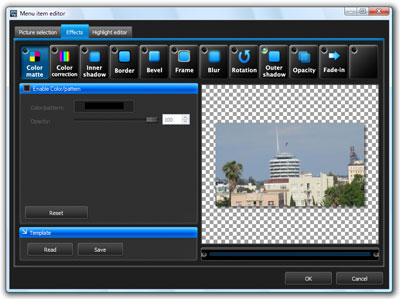
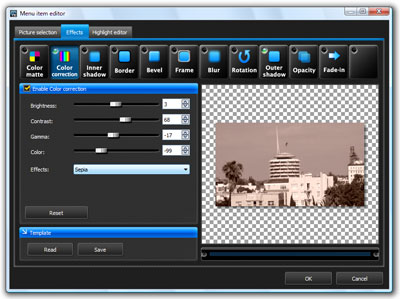
To access the Effects window, simply click on the Effects tab in the Menu Item Editor.
What's What In the Effects Window
|
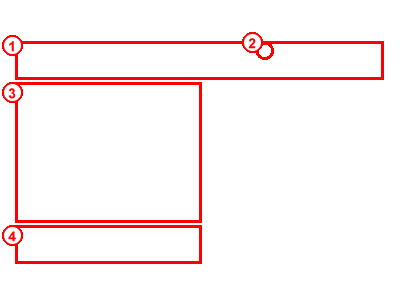
1. These are all the available effects. You can click on an effect to select it. 2. This green button means that the effect is active. You can click on the this area to activate/deactivate an effect. 3. These are the settings for the selected effect. 4. You can save the setting of your effects as a template file to use later. |
Let's Try Using An Effect
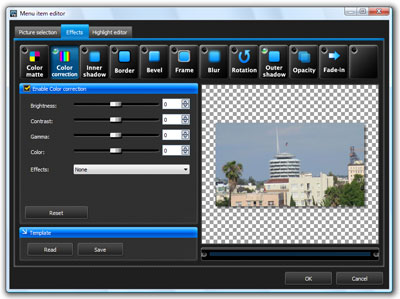
For this tutorial we'll use the Color Correction effect on our thumbnail image.
|
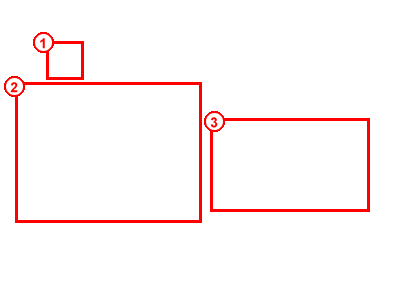
1. First, let's activate the Color Correction effect. You can activate it by clicking on the empty circle in the corner of the Color Correction button so that it turns green. 2. Then, let's adjust the color correction settings in this window. 3. You can preview the changes to your thumbnail in real time with this preview area. |
|
In this example, we'll select the Sepia effect and make some other adjustments to the other settings. Feel free to change each setting as you see fit. When you're done, click OK to confirm your effects, or continue to add other effects. |
