Home > Products > TMPGEnc Authoring Works 4 > Tutorials > Menu Creation: Starting Out
Tutorials
Tutorials
Menu Creation

Starting Out
TMPGEnc Authoring Works 4 allows you to create a menu for your video that is viewable on DVD players at home or on the computer. With its easy to use menu tools, you can make menus from pre-installed templates or even create your own custom menus.
Accessing the Menu Stage and the Menu Wizard


|
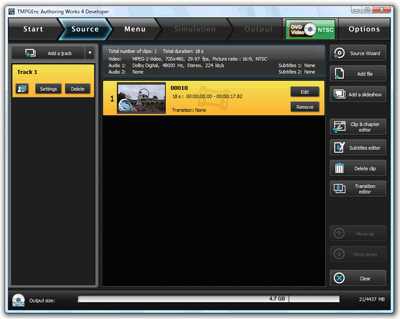
To access the Menu Stage and the Menu Wizard, you need to have added source files in the Source Stage. Once this is done, you can click on the "Menu" button to access the Menu Stage. |

|
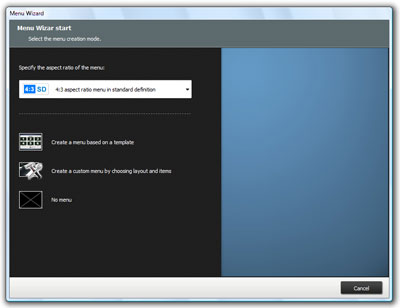
Once you enter the Menu Stage, the Menu Wizard window should open. |
Here is a breakdown of the options available in the Menu Wizard (these are the options listed for a DVD-Video project; a BDMV project may vary slightly):

Select to create your menu in 4:3 aspect ratio.

Select to create your menu in 16:9 aspect ratio. If you are creating a menu in 16:9 aspect ratio, you can have more thumbnail buttons than a 4:3 aspect ratio menu.

Create a menu based on a template.
Selecting this will create a menu based on the pre-installed menu templates. Pre-installed menu templates cannot be modified to the extent of a custom menu.

Create a custom menu by choosing layout and items.
Selecting this will allow you to create an original menu, giving you control over the thumbnail layout, buttons, frames, and background. You can also alter the size of thumbnails and edit the navigational paths of menu items

No menu.
This should only be chosen if you have a single track in your project. If you have multiple tracks and you choose this option, the DVD may not play correctly.
Note: You cannot mix 4:3 and 16:9 aspect ratio menus.
Next: Menu Templates Back to the Tutorial Index
