
Home > Products > TMPGEnc Authoring Works 4 > Tutorials > Menu Creation: Editing Custom Menus
Tutorials
Tutorials
DVD Creation
Adding Subtitles
Transition Effects
Menu Creation
Title Sequences
Menu Creation

Editing Custom Menus
Now that we've created a custom menu, let's learn how to edit the thumbnails.
Only custom menus can be edited in the following manner; menus created from templates cannot be changed.
What's What in the Menu Editing Screen
|
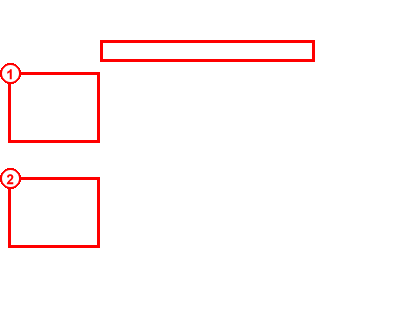
1. The menu pages will be displayed in this list. You can expand top and track menus to see all of the pages within each menu. 2. This is the menu item list that displays the menu parts within the selected menu page. |
At the top of the menu editing screen, there are three tabs:

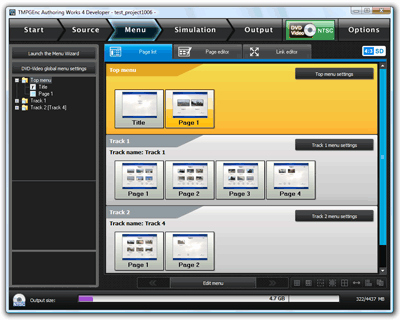
This tab will display a list of all of the menus and their pages. Use this to easily select a page for editing or view all of your menu pages.

This tab allows you to edit the contents of a menu page. This is where you'll edit menu parts like editing track names and thumbnail resizing.

This tab lets you edit the way your DVD remote's directional pad navigates the menu items.
Menu Editing
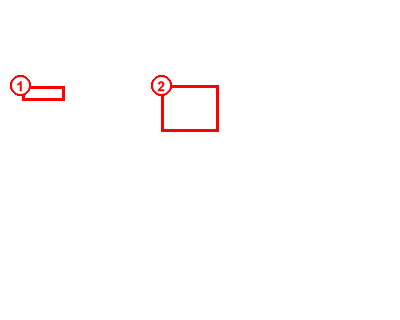
1. Select a Menu Page To Edit
|
1. To select a page to edit, click a page in the Page Tree List. 2. Or, you can double click on a page thumbnail in the Page List. You can also click a page thumbnail once to select it, then click on the Page Editor tab to edit it. |
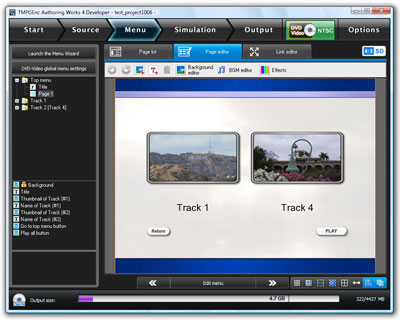
2. The Page Editor

|
We are now in the Page Editor. You can click on any menu item (thumbnail, title, button) to start editing it. Let's click on a thumbnail. |
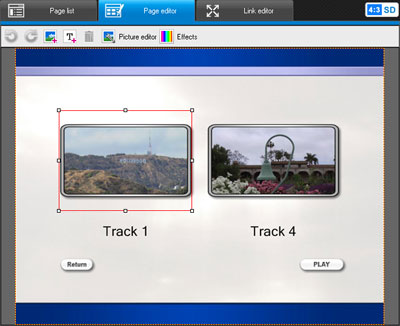
|
Once you click on a thumbnail, you'll notice that a red frame appears around it. This means that it is selected and ready to edit. |
