
Home > Products > TMPGEnc Authoring Works 4 > Tutorials > DVD Creation: Adding Source Files
Tutorials
Tutorials
DVD Creation
Adding Subtitles
Transition Effects
Menu Creation
Title Sequences
DVD Creation

Editing Clips
With the clip editing feature, you can cut out unwanted scenes from your video. You can access the Clip Editing window from the Clip Addition window, or by clicking on the edit button in the clip list in the Source Stage.
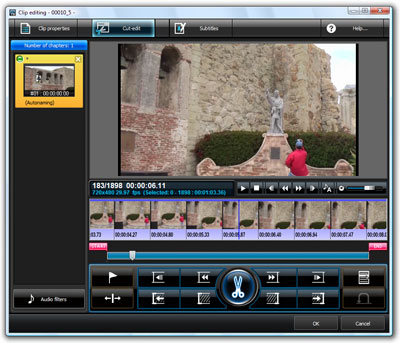
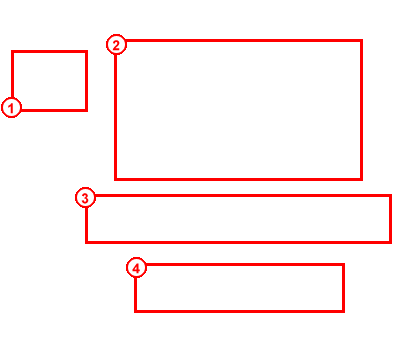
What's What In The Cut-Edit Screen
|
1. Chapter 2. Preview Screen 3. Thumbnail Display 4. Control Panel |
How to Cut Edit
These are the basic controls for the cut editing process.
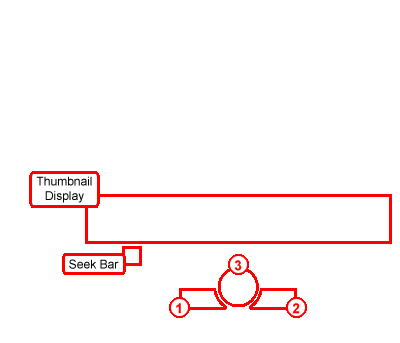
| Step 1. | You can select the content to be cut by navigating your video with the Seek Bar  or the thumbnail display. Go to the first frame of the section you would like to cut. or the thumbnail display. Go to the first frame of the section you would like to cut. |
| Step 2. | After you have picked your first frame, click on the "Set First Frame" button  . . |
| Step 3. | Then, navigate to your end frame of the content you would like to cut with the Seek Bar or Thumbnail Display. |
| Step 4. | After you have selected your end frame, click on the "Set End Frame" button  . . |
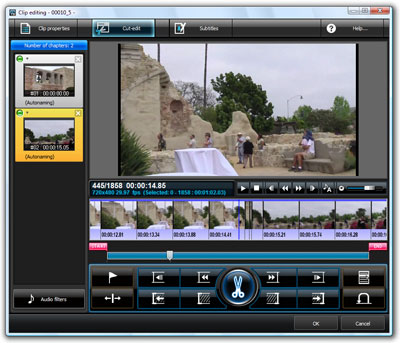
| Step 5. | You have now selected the footage you are going to cut which should be highlighted in the Thumbnail Display. Simply click the "Cut" button  to cut-out the selected section of video. to cut-out the selected section of video. |
Remember that only the content between the Start and End frame will be cut.
|
1. After clicking the Cut button, the cut section is added to the chapter list.
2. The Thumbnail Display will be automatically updated with the cut section removed. 3. Click "OK" to accept the cut(s). |
Besides cut-editing, TMPGEnc Authoring Works 4 allows you to add or edit subtitles and use audio filters. For more information about what else you can do, please read the help file included with the software.
Next: Menu Creation Back to the Tutorial Index