
Home > Products > TMPGEnc Authoring Works 4 > Tutorials > DVD Creation: Adding Source Files
Tutorials
Tutorials
DVD Creation
Adding Subtitles
Transition Effects
Menu Creation
Title Sequences
DVD Creation

Adding Source Files
After selecting "Start A New Project" in the Start Stage, you go to the Source Stage where the Source Wizard will automatically appear (This can be turned off). From the Source Wizard, you can select what type of source file you would like to add. You can add files from your computer, DVDs, captures from DV/HDV camcorders, or digitally recorded programs. This tutorial will show you how to add clips from files on your computer.
The term, "clip" refers to the video file inputted into TMPGEnc Authoring Works 4.
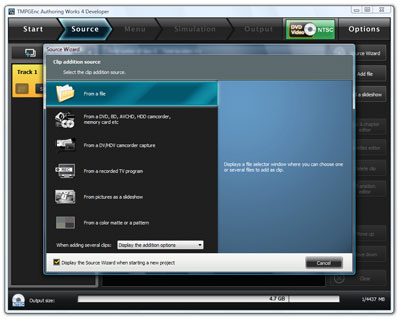
1. Source Wizard: How to Add a Clip

|
Click on the "From a file" option in the list of available source types.
This will open a new window where you can select a file. |
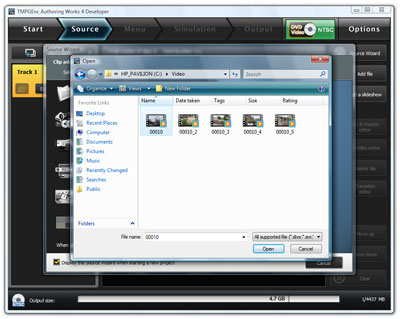
2. Source Wizard: Select File
|
1. Select any video file that you want to use from a location on your computer.
2. After selecting your file, click the "Open" button in the lower-right corner. |
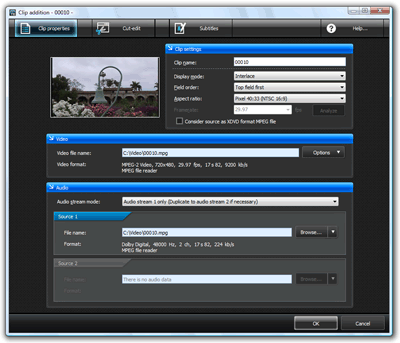
3. Clip Addition Window

|
A Clip Addition window should open.
Edit your clip, or just click "OK" to move on. |
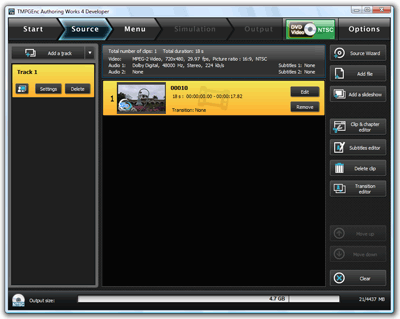
4. Image File Added
|
1. Now that you have added a clip, the next step (Menu) is accessable.
2. The video file you selected is now available as a clip in the clip list. 3. You can add more video files with the options at the upper-right of the screen. 4. Or, you can edit, add subtitles, add transition effects, or delete your clips. |
After you are done adding your clips, you can click on the "Menu" button to go to the next stage.
Next: Editing Clips Back to the Tutorial Index