
Home > Products > TMPGEnc Authoring Works 4 > Tutorials > Menu Creation: Link Editor
Tutorials
Tutorials
DVD Creation
Adding Subtitles
Transition Effects
Menu Creation
Title Sequences
Menu Creation

Link Editor
The Link Editor allows you to change what happens when you navigate your menu with a DVD remote's directional buttons. For instance, this allows you to change what happens when you press the right arrow button on your DVD remote.
You can access the Link Editor in the Menu Stage by clicking on the Link Editor tab.
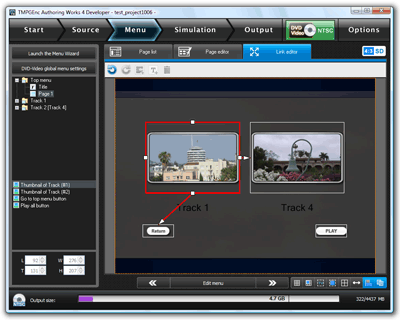
1. First, Select A Menu Item

|
When you click on a menu item, a bounding box will appear around the item along with lines that show how it is linked to other menu items. |
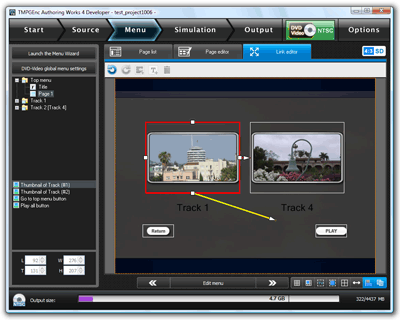
2. Let's Change A Link
|
You'll notice that the bounding box around the menu item has four anchor points, one on each side. These represent the directional keys on your DVD remote. So the anchor point on the bottom side of the bounding box correlates to the down arrow key on your DVD remote. To edit this link, click on the anchor point and drag it. You'll see a visible line following your cursor as you drag it. |
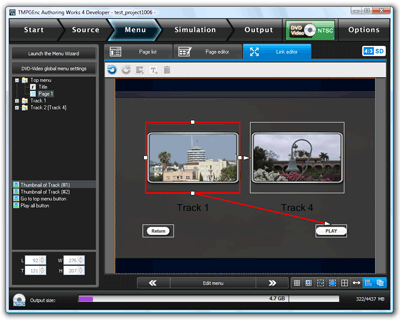
3. Drag the Point to Another Menu Item
|
You can now drag this point to another menu item. Notice that it automatically "snaps" to other menu items. |
4. The Link Has Been Edited!
|
You have now altered the link between these two menu items. You can alter any link for any selectable menu item. |
5. Checking Your Links
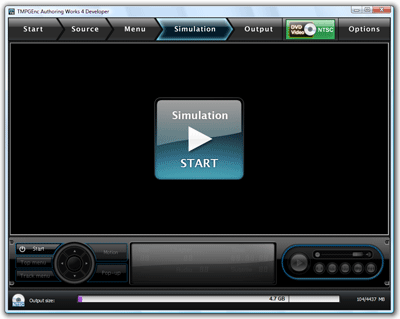
To test how your links work, you'll have to go to the Simulation Stage.
|
1. Click on the Simulation button to go to the Simulation Stage. 2. Click on the "Start" button to begin the simulation. |
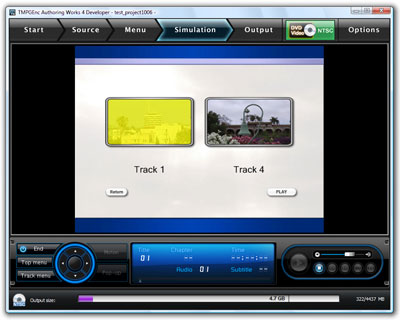
6. Using the Simulation Controls

|
After the simulation has started, you can click on the "Top Menu" or "Track Menu" buttons to access those menu pages. Once there, you can select a menu item and use the directional buttons to test how your links work with a DVD remote. |
