Full Featured.
And then some.
TMPGEnc Authoring Works 4 is packed with features to help you create professional-looking DVDs and Blu-ray Discs that you'll love to share with friends and family.
Also, be sure to check out the New Features section for more great features!
Easy-to-use interface.
Intuitive step-by-step process.
Each TMPGEnc Authoring Works 4 project is divided into 5 stages: Start, Source, Menu, Simulation, and Output. Simply complete each stage in order and you'll have a custom DVD or Blu-ray Disc movie in no time. You can even go back to previous stages to make changes, or skip certain stages depending on your needs. Various wizards are included to help guide you through more complicated tasks, such as menu creation and file importing.


Check out our Guided Tour of Authoring Works 4 for a quick overview of the authoring process!
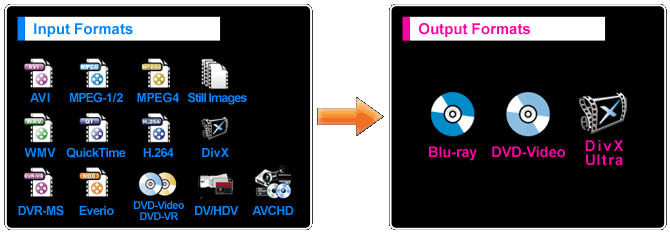
Extensive input formats.
Convert to DVD and Blu-ray Disc compliant video.
TMPGEnc Authoring Works 4 will automatically convert a vast array of video file formats to DVD, Blu-ray Disc, or DivX formats. You can even convert your AVCHD videos and keep them in full-HD (1920 × 1080) when you output to Blu-ray Disc.
DivX® Ultra Authoring.
Create high quality DivX video with advanced features.
 With DivX® Ultra authoring, your DivX projects can have advanced features such as DVD-like menus and navigation! DivX projects created with TMPGEnc Authoring Works 4 are the ultimate combination of DVD-like presentation with DivX technology. Play your DivX Ultra projects with DivX Player software on your PC or any DivX Ultra Certified DVD player in the comfort of your livingroom.
- Officially licensed DivX® video software product
- Creates high-quality DivX® video
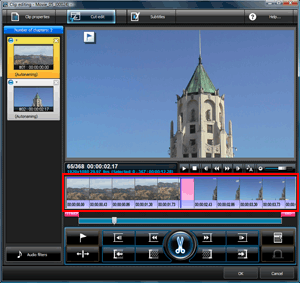
Search smarter with Smart Scene Search™.
Find scene changes with a single click.

It can be tedious to look for all of the scene changes in your video clips, especially when you've got hours of footage. This is where Smart Scene Search comes in. While editing, all you have to do is click your middle mouse button to the right or the left of the playhead in the thumbnail preview to automatically find the next or previous scene change. This makes it easy to set key frames, find a good place to cut scenes, or split your clip.

Just click with the middle mouse button in the thumbnail preview to find the next scene change.
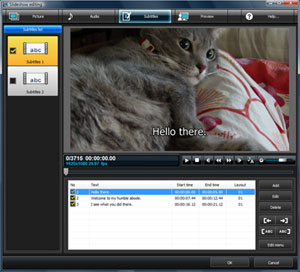
Add your own subtitles.
Read what they're saying.
Add up to two subtitle streams to your videos with the subtitle editor. Import subtitles from a DVD or create your own with tools for positioning, timing, font styles and more. Create multi-language subtitles or use it for the hearing impared. Subtitles also work great as captions for slideshows too.
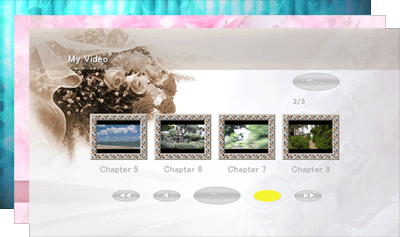
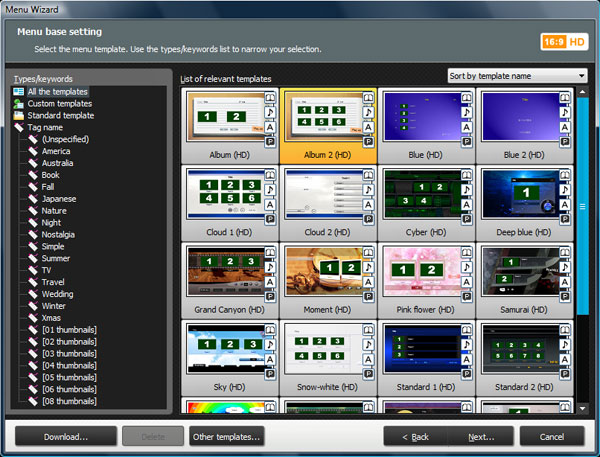
Create interactive menus.
Use templates or customize them yourself.
What's a DVD, Blu-ray, or DivX ULTRA disc without a nice menu? The menu wizard will guide you through the menu-making process, allowing you to create menus in standard and high definition with aspect ratios of 4:3 or 16:9. You can even create pop-up menus with your Blu-ray Disc projects. Of course, you can choose not to create a menu at all as well.
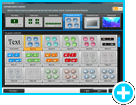
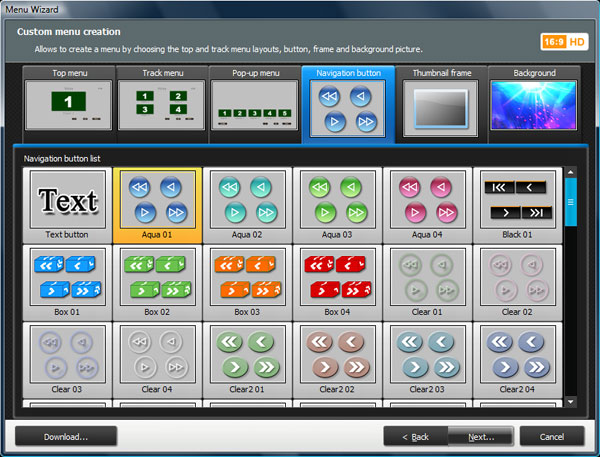
Custom Menus
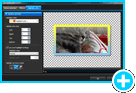
Want to make something truly unique? Then choose to create a custom menu where you can alter practically everything about your menu. Change the background to a personal photo, make your own navigation buttons, add graphical effects to your chapter thumbnails, alter page titles, and more. When you're all done, you can even save your menu as a template so you can use it over and over again.
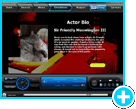
Add a note page.
Add note pages to your menus that can contain actor bios, production notes, trivia, history, extra images, or whatever else your imagination can come up with. (Not available for DivX ULTRA menus.)
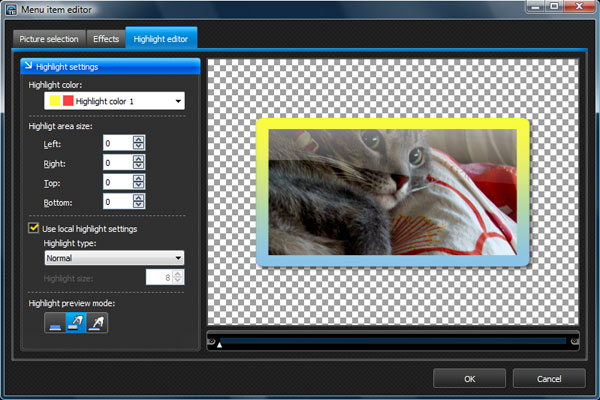
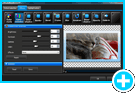
Highlight editor.
Change the way menu items are highlighted with the highlight editor. Maybe you want the play button to be outlined, or maybe you want the whole button to be highlighted when you select it. You can also change the highlight colors.
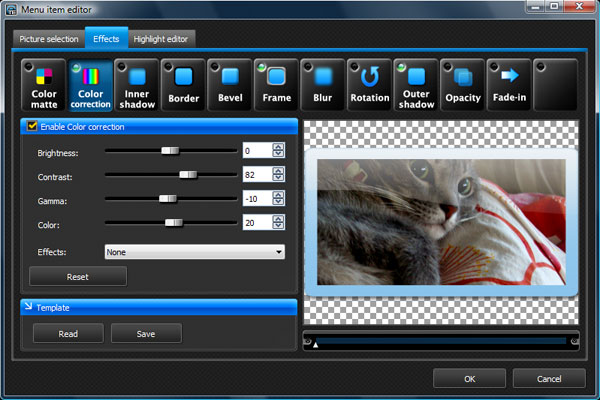
Menu item effects.
With custom menus, you can add effects to each menu item (buttons, thumbnails, title text, etc.). Add a drop shadow to all of your text, change the color of your chapter thumbnails to a sepia tone, rotate your buttons, change the opacity of your menu title, and much, much more.
Animate menus with motion menu settings.
Breath new life into your menu when you activate the motion menu settings! You can use a video in place of menu items such as backgrounds and buttons, and animate your track and chapter thumbnails to give your menus that extra professional touch. You can even add background music to create a complete audio/visual menu experience!
Edit and output in a flash.
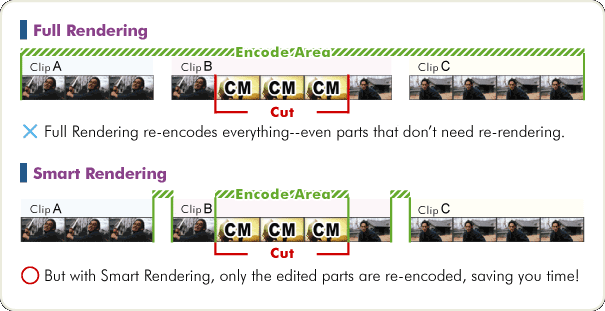
Smart Rendering allows you to output DivX, DVD or Blu-ray Disc compliant video without having to re-encode the entire movie file. This makes output extremely quick, and when you cut out a scene, only the video frames before and after the cut section will be re-encoded, saving you a ton of time and keeping the same quality as the original source file. Applicable clips will have a Smart Rendering icon in the Source stage of the program.
Check out a video demonstration of how Smart Rendering can save you time!
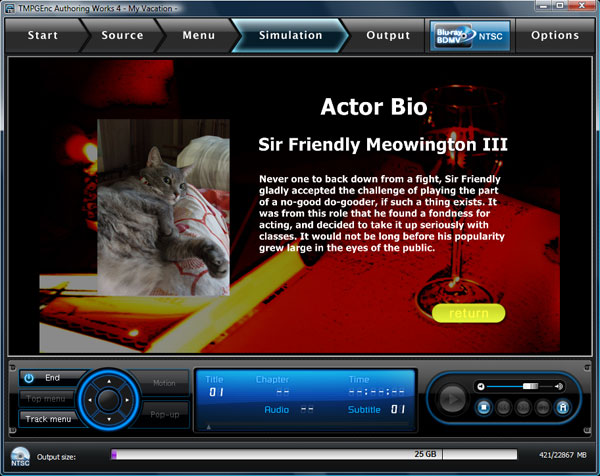
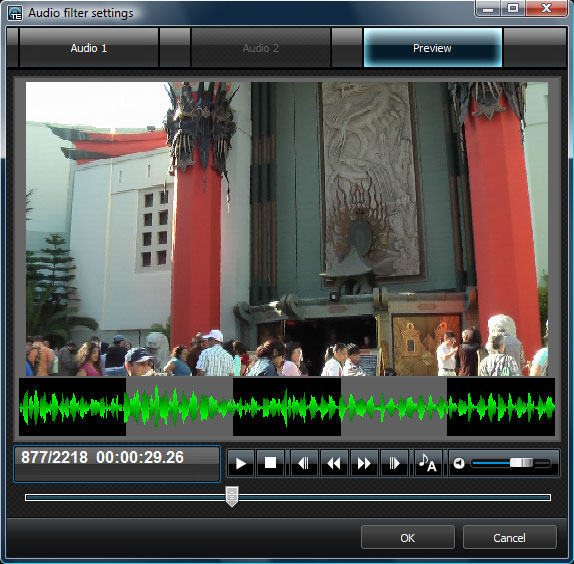
Simulation feature.
Test your creation before you output.
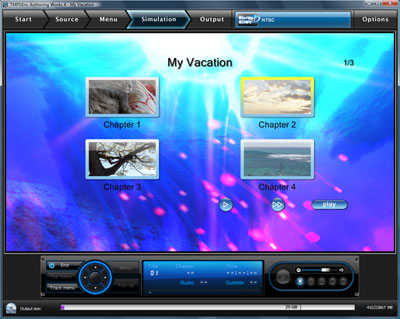
See what your Blu-ray/DVD/DivX project looks like before you output it with the Simulation feature. This will reproduce what your project will look like when you put it in a real DVD/Blu-ray player. Test out your menus, audio tracks, subtitles, and menu item effects that you've applied. We've even included controls that mimic a DVD remote so you can see what it would be like to navigate through your menus. Don't like what you see? Go back and make changes, then test it again.
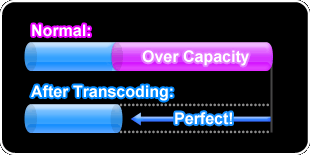
Transcode feature.
Never worry about running out of space.
Sometimes you might have so much content that you can't fit it on the DVD. What do you do? You can get rid of some clips, or you can use the transcode feature which can automatically adjust the bitrate of your movie so that it will fit on your target media. Simply set your target media (DVD, Blu-ray Disc) or set a custom output size and TMPGEnc Authoring Works 4 will do the rest.
Please note that while lowering the bitrate decreases the file size of your movie, it will also decrease the quality as well.
Multiple tracks.
Up to 99 tracks per project.
Got a lot of footage? Add up to 99 video tracks to your project. That's 99 episodes, 99 home videos, 99 slideshows, 99 tracks of whatever video you've got! So go ahead and an extra track or two...or three...or four...

The firstplay track.
Add an intro video or logo.
The firstplay track will play once you insert your DVD or Blu-ray Disc into your player. Use it to include an introduction video, corporate logos, sponsorship logos, or whatever you can think of.
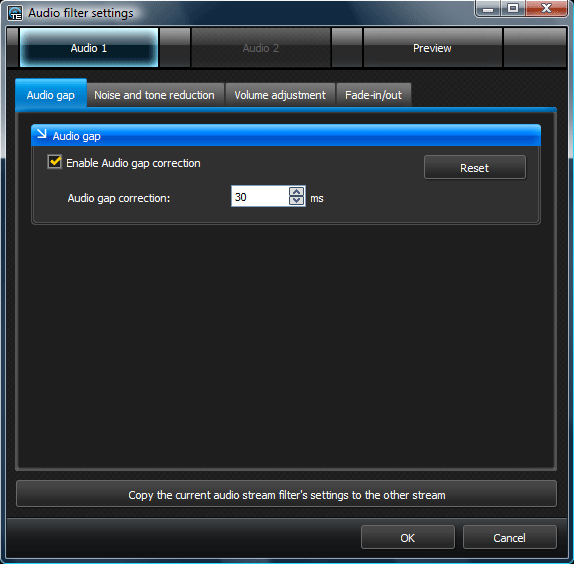
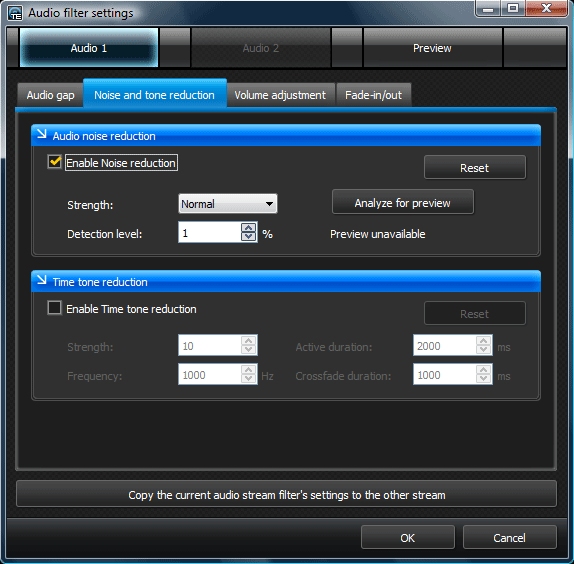
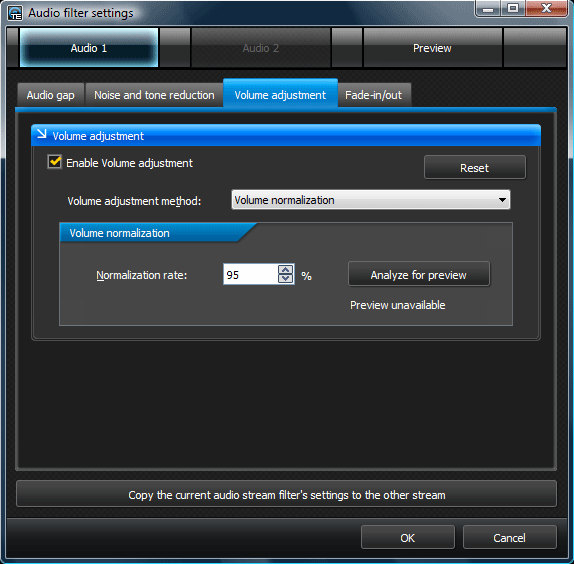
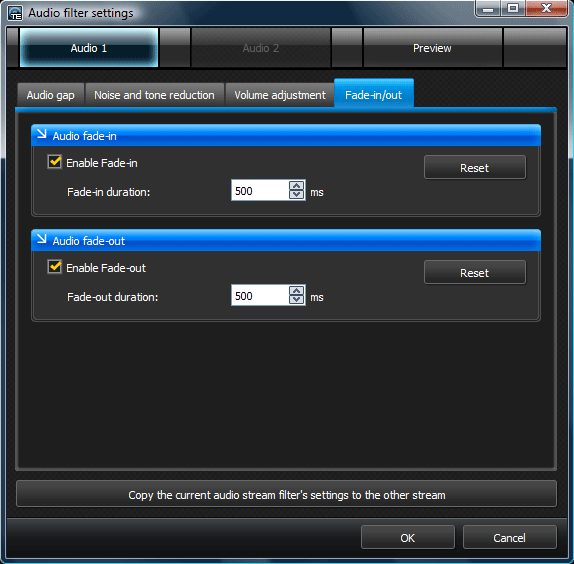
Fix your audio.
Make adjustments with audio filters.
Is your audio track a little out of sync? Use the audio gap correction to fix it. You can also adjust the volume levels, add fade in/out effects, and apply noise and signal reduction filters.